Embedding Multimedia Elements in Web Pages
So far, we've studied inserting and manipulating text, but the web would be extremely boring if we only used text in web pages. Let's begin exploring how to introduce more interesting content into web documents. This section explores how to use HTML markup to include multimedia in web pages—namely, images, videos, audio, and even entire web pages.
Images in HTML
How do we insert an image into a web page?
To insert a simple image into a web page, we use the <img> element. This is an empty element (which means it has no text content or closing tag) and requires a minimum attribute to be useful—src (source). The src attribute contains a path to the image you want to embed in the page, which can be a relative or absolute URL, in the same way as the href attribute values in <a> elements.
For example, if the image is named horse.png and is located in the same directory as the HTML page, you can embed the image like this:
<img src="horse.png">If the image is located in a subdirectory named "images" (Google recommends this for better SEO indexing), which is in the same directory as the HTML page, then you embed it like this:
<img src="images/horse.png">☞ Search engines also read image file names and assign them value, which matters for SEO (Search Engine Optimization). Therefore, you should give your image a more descriptive name—horse.png is better than image-1258.jpg.
You can embed the image using an absolute URL, for example:
<img src="https://www.example.com/images/horse.png">However, this is not ideal, as it causes the browser to work harder, looking up the IP address again from the DNS server, etc. Ideally, you should place images on the same server where your site's pages are hosted.
☞ Attention: most images are protected by copyright. Do not display an image on your web page unless:
- The image belongs to you.
- You have received explicit written permission from the image owner.
- You have clear proof that the image is in the public domain.
The code above gives us the following result:

☞ Elements like <img> and <video> are sometimes referred to as replaced elements. This is because the size and content of the element are defined by an external resource (such as an image or video file), not by the content of the element itself.
Alternative Text
The next attribute we'll refer to is alt. Its value is assumed to be a textual description of the image, to be used in situations where the image cannot be seen/displayed or takes a long time to load due to a slow Internet connection. For example, our code above could be modified as follows:
<img src="images/horse-silhouette.png" alt="black horse silhouette on a white background">The simplest way to test the alt text is to intentionally misspell the image file name. If, for example, our image name were written like this: horse-silhouetteeeeeeeeee.png, the browser would not display the image and would show the alt text instead:
Why is alternative text needed? Here are a few reasons:
- The user is visually impaired and uses a screen reader to read web pages. In fact, having alt text available to describe the image is helpful for most users.
- As described above, the file name or path to it may be incorrect.
- The browser does not support the image type used.
- You may want to provide alt text for the search engines you use—for example, search engines can match alt text with search queries.
- Users have disabled image display to reduce distractions and data transfer volume. This is especially common on mobile phones and in countries where bandwidth is limited or expensive.
What should you write inside the alt attribute? It depends on why the image is there in the first place. In other words, what do you lose if your image doesn't appear:
- Styling. This assumes you use CSS background images for decorative visuals, but if you must use HTML, add an empty alt attribute alt="". If the image is not part of the HTML content, a screen reader shouldn't waste time reading it.
- Content. If your image provides meaningful information, provide the same information in a short alt text—or even better, in the main text that everyone can see. Don't write redundant alt text. How annoying would it be for a visually impaired user if all paragraphs were written twice in the main content? If the image is adequately described by the main body text placed next to it, then you can again use an empty alt attribute alt="".
- Link. If you wrap an image inside <a> tags to turn it into a link, you still need to provide accessible link text. In such cases, you can write it inside the same <a> element or within the image's alt attribute—whichever method suits you best.
- Text. You should not place text inside images. If the main heading needs a shadow, for example, use CSS for that rather than embedding the text in an image. However, if you cannot avoid this, you should provide accessible text inside the alt attribute.
In conclusion, the key is to provide a pleasant experience even when images cannot be seen. This ensures that no user is deprived of content. Try disabling images in your browser and see how things look. You'll soon realize how useful alt text is when the image cannot be displayed.
Width and Height
You can use the width and height attributes to specify the dimensions of the image. Returning to our example, we could do this:
<img src="images/horse-silhouette.png" alt="black horse silhouette on a white background" width="400" height="341">Under normal circumstances, we won't see much difference. But if, for example, the user has just landed on the page and the image hasn't loaded yet, you'll notice that the browser leaves space for the image to appear:
This is fine and leads to faster and smoother page loading.
However, you should not resize your images using HTML attributes. If you set the image size too large, you'll end up with poor-looking images and wasted bandwidth, downloading an image that doesn't match the rest of the content. The image may also appear distorted if you don't maintain the correct aspect ratio. You should use an image editor to resize the image to the desired dimensions before placing it on the web page.
Image Title
As with links, you can also add title attributes to images to provide additional information if needed. In our example, we could do this:
<img src="images/horse-silhouette.png" alt="black horse silhouette on a white background" width="400" height="341" title="Stylized black horse on white background">Now, when the mouse cursor hovers over the image, the text contained in the title attribute will be displayed as a tooltip.
However, this is not recommended—the title has several accessibility issues, mainly because screen reader support is highly unpredictable and most browsers won't display it unless you hover the mouse over it. It's better to include such information in the text that refers to the image rather than attaching it to the image using the title attribute.
Annotating Images in HTML5
A better solution is to use the HTML5 <figure> and <figcaption> elements. These were created specifically for this purpose—to provide a semantic container and clearly link the image to its text. Our example above could be rewritten like this:
<figure>
  <img src="images/horse-silhouette.png" alt="black horse silhouette on a white background" width="400" height="341">
  <figcaption>Stylized black horse on white background</figcaption>
</figure>The figcaption element tells browsers and assistive technology that the displayed text (caption) describes the content of the figure element.
☞ From an accessibility standpoint, captions (figcaption) and alt text have distinct roles. Captions can be seen and read, while alt text provides functionality when the image isn't loaded. Therefore, captions and alt text should not say the same thing, since both are visible when the image isn't displayed, as shown in the example below.

A figure element doesn't have to be an image. It's an independent unit of content that:
- expresses meaning in a compact, easy-to-understand way,
- can be placed in multiple locations within the linear flow of the page,
- provides essential information that supports the main text.
A figure element could contain multiple images, a code snippet, audio, video, equations, a table, or something else.
CSS Background Images
You can also use CSS to embed images into web pages. The CSS background-image property and other background properties are used to control the placement of the background image. For example, to place a background image next to each paragraph on a page, you can do this:
 p {
  background-image: url("images/horse-silhouette.png");
}
An image embedded this way is easier to position and control than images embedded in HTML code. As shown above, CSS background images should only serve a decorative purpose. If you want to add a nice image to your page to make it more visually appealing, that's fine. However, such images have no semantic meaning, cannot have any text equivalent, and are invisible to screen readers.
☞ In conclusion: if an image is meaningful to the page content, it should be integrated into the HTML code. If an image is purely decorative, you should use CSS background images.
Video and Audio Content
Now that we know how to add simple images to a web page, the next step is to start adding video and audio players to HTML documents. In this section, we'll do that using only the video and audio elements.
The Video Element
The <video> element allows you to embed a video very easily. A very simple example looks like this:
<video src="video/jellyfish.webm" controls>
<p>Your browser does not support the video format. Try the following <a href="video/jellyfish.webm">video link</a>.</p>
</video>
The following elements are noteworthy:
- src
- Just like with the <img> element, the src (source) attribute contains a path to the video you want to embed. It works exactly the same way.
- controls
- Users must be able to control video and audio playback (this is especially important for people with epilepsy). You must use the controls attribute to include the browser's control interface or build your own using the appropriate JavaScript API. The interface should include, at minimum, a way to start and stop the media file and adjust the volume.
- p
- The paragraph inside is called fallback content—it will be displayed if the browser accessing the page does not support the video element, allowing us to provide an alternative for older browsers. The paragraph can contain anything—in this case, we've provided a direct link to the video file so the user can still access it in some way, regardless of the browser they're using.
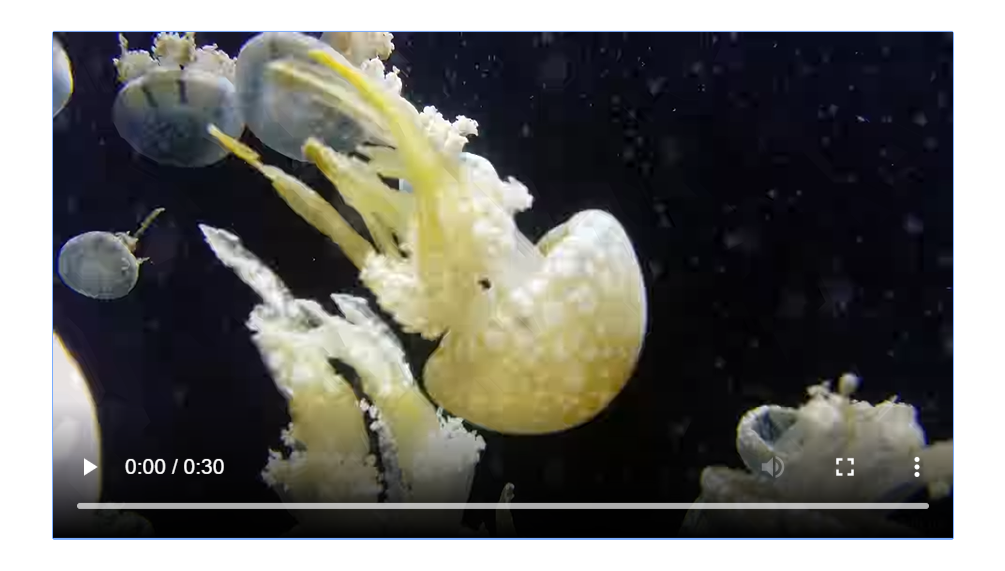
The embedded video will look like this:
Using Multiple Source Formats to Improve Compatibility
There's a problem with the example above—namely, the video won't play in Internet Explorer or in older versions of other browsers, because different browsers support different video (and audio) formats. Fortunately, there are things you can do to help prevent this issue.
Media File Content
First, let's quickly go over the terminology. Formats like MP3, MP4, and WebM are called container formats. They define a structure in which the audio and/or video tracks that make up the media are stored, along with metadata describing the media, what codecs are used to encode its channels, etc.
The audio and video tracks inside the container contain data in the format of the codec used to encode that media. Different formats are used for audio tracks versus video tracks. Each audio track is encoded using an audio codec, while video tracks are encoded using (as you probably guessed) a video codec.
For example:
- A WebM container typically contains Vorbis or Opus audio with VP8/VP9 video. This is supported in all modern browsers, though older versions may not work.
- An MP4 container contains AAC or MP3 audio with H.264 video. This is supported in all modern browsers, including Internet Explorer.
- The Ogg container tends to use Vorbis audio and Theora video. It's best supported in Firefox and Chrome, but has largely been replaced by the higher-quality WebM format.
There are a few special cases. For example, with some types of audio, codec data is often stored without a container or in a simplified container. One such example is the FLAC codec, which is most commonly stored in FLAC files that are just raw FLAC tracks.
Another situation involves the popular MP3 file. An MP3 file is actually an MPEG-1 Audio Layer III (MP3) audio track stored in an MPEG or MPEG-2 container. This is particularly interesting because, while most browsers don't support MPEG media in video and audio elements, they can still support MP3 due to its popularity.
An audio player will typically play an audio track directly, e.g., an MP3 or Ogg file. These don't require containers.
Media File Support in Browsers
The codecs described in the previous section exist to compress video and audio into manageable files, since raw audio and video are both extremely large. Each web browser supports a selection of codecs, such as Vorbis or H.264, which are used to convert compressed audio and video into binary data and back. Each codec offers its own advantages and disadvantages, and each container format also has its own positive and negative characteristics that influence the decision to use one over another.
Things get slightly more complicated because each browser supports only a specific set of container file formats, as well as a different selection of codecs. To maximize the likelihood that your site or application works in a user's browser, you may need to provide each media file you use in multiple formats. If your site and the user's browser don't share a common media format, your media simply won't play.
Therefore, choosing the best combination of codecs and container format can be a tricky task.
Another thing to keep in mind is that mobile browsers may support additional formats that aren't supported by their desktop counterparts. Most of the time, support for a particular media type depends partly on the software installed on the user's device.
So how do we solve these problems? Take a look at the following example:
<video controls>
<source src="video/jellyfish.mp4" type="video/mp4">
<source src="video/jellyfish.webm" type="video/webm">
<p>Your browser does not support the video format. Try the following <a href="video/jellyfish.webm">video link</a>.</p>
</video>
Here, we've removed the src attribute from the video tag itself and instead included separate source elements that specify the individual sources. In this case, the browser will go through the source elements and play the first media file for which it has the necessary codec. Including both WebM and MP4 sources should be enough to play video on most platforms and browsers today.
Each source element also has a type attribute. This is optional, but it's recommended to include it. The type attribute contains the MIME type of the file specified by source, and browsers can use this to immediately skip over videos they can't play. If the type is not included, browsers will load and attempt to play each file until they find one that works, which obviously takes time and is an inefficient use of resources.
Other Video Features
There are a number of additional features you can include when displaying an HTML video. Take a look at the following example:
<video controls width="400" height="400" autoplay loop muted preload="auto" poster="images/horse.png">
<source src="video/jellyfish.mp4" type="video/mp4">
<source src="video/jellyfish.webm" type="video/webm">
<p>Your browser does not support the video format. Try the following <a href="video/jellyfish.webm">video link</a>.</p>
</video>
The result looks like this:

We used the horse.png image, previously shown in the "Images in HTML" section, as the value of the poster attribute.
The new elements appearing in the example above are as follows:
- width and height
- You can control the size of the video either with these attributes or with CSS. In both cases, videos retain their native width-height ratio—known as the aspect ratio. If the aspect ratio is not maintained by the set dimensions, the video will stretch to fill the horizontal space, and the unfilled space will receive a solid background color by default.
- autoplay
- Causes the audio or video file to start playing immediately while the rest of the page loads. It's recommended not to use this option, as users may find it very annoying.
- loop
- Causes the video (or audio file) to start playing again every time it reaches the end. This can also be annoying, so use the option only if truly necessary.
- muted
- Sets the media file to be muted by default.
- poster
- Contains the URL of an image that will be displayed before the video starts playing. It's intended to be used as a splash screen or promotional screen.
- preload
- Used to create a buffer for large files and can take one of three values:
- none – no buffer is created
- auto – buffer is created
- metadata – buffer is created only for metadata
Displaying Subtitles for Video
Now we'll discuss a slightly more advanced concept that can be truly useful at times. Many people cannot or do not want to hear the audio/video content they find on the web, at least during certain hours.
Wouldn't it be nice to offer these people a transcript of the spoken words in the audio/video? Well, it's possible. For this, we use the WebVTT file format and the <track> element.
WebVTT is a format for writing text files that contain multiple text strings along with metadata, such as the time in the video when each string should be displayed, and even limited styling/positioning information. These text strings are called cues, and there are several types of cues used for different purposes. The most common cues are:
- subtitles
- Translations from foreign languages for people who don't understand the spoken words in the audio.
- captions
- Synchronized transcriptions of dialogue or descriptions of significant sounds, to help people who are deaf understand what's happening.
- timed descriptions
- Text that should be played by the media player to describe important moments for blind or visually impaired users.
A typical WebVTT file will look like this:
WEBVTT

1
00:00:20.2550 --> 00:00:22.711
This is the first subtitle.

2
00:00:28.539 --> 00:00:32.092
This is the second subtitle.

...
To display subtitles along with HTML media playback, you need to:
- Save the file with a .vtt extension.
- Add a link to the .vtt file inside a track element. The track element should be placed inside the audio or video element, but after all source elements. Use the kind attribute to specify whether the cues are subtitles, captions, or descriptions. Additionally, use srclang to tell the browser what language the subtitles are written in.
Here's an example:
<video controls>
<source src="video/jellyfish.mp4" type="video/mp4">
<source src="video/jellyfish.webm" type="video/webm">
<track kind="subtitles" src="subtitrare_ro.vtt" srclang="ro">
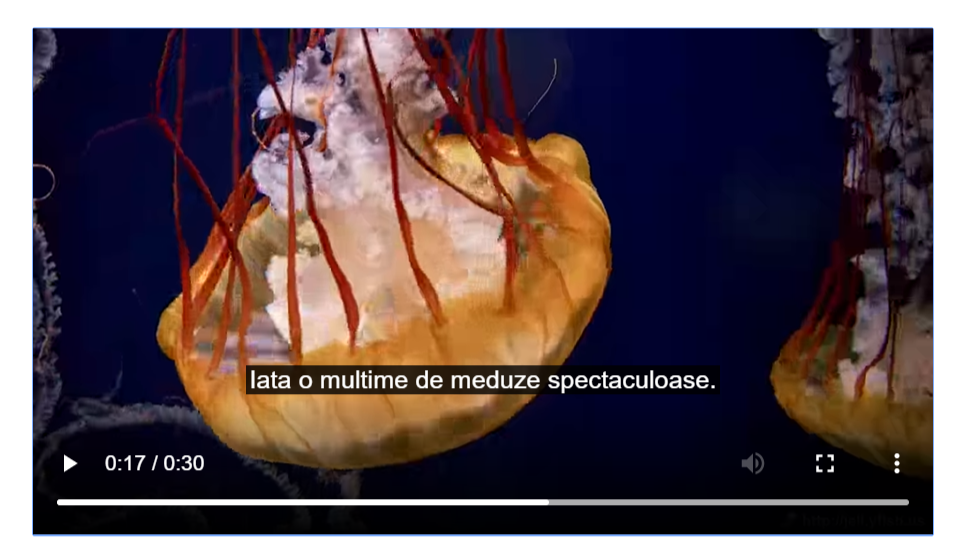
</video>This way, the video will display subtitles like this:
The Audio Element
The audio element works just like the video element, with a few small differences as shown below. A typical example might look like this:
<audio controls>
<source src="audio/test.mp3" type="audio/mp3">
<source src="audio/test.ogg" type="audio/ogg">
<p>Your browser does not support the audio format. Try the following <a href="audio/test.mp3">audio file link</a>.</p>
</audio>
The code above produces something like the following in a browser:
The audio player takes up less space than a video player because there's no visual component—you only need to display controls to play the audio. Other differences from HTML video include:
- The audio element does not support width/height attributes—because there's no visual component.
- It also does not support the poster attribute—again, no visual component.
Otherwise, all attributes valid for video are also valid for audio.
From object to iframe – Other Embedding Technologies
In this section, I'll introduce other elements that allow you to embed a wide variety of content types into your web pages: the iframe, embed, and object elements. The iframe element is intended for embedding other web pages, while the other two allow you to embed PDFs, SVGs, and even Flash—a technology that is on its way out, but you may still encounter it occasionally.
Let's look at how YouTube allows us to embed a video into any page we want using the iframe element:
- First, go to YouTube and find a video you like.
- Below the video, you'll find a Share button—click it to display sharing options.
- Select the Embed button and you'll see an iframe code—copy this code.
- Paste the code into any HTML page and see the result.
I chose a Pixar movie—here's the code and the result below:
<iframe width="560" height="315" src="https://www.youtube.com/embed/bX1NLuJrPZg" frameborder="0" allow="accelerometer; autoplay; encrypted-media; gyroscope; picture-in-picture" allowfullscreen></iframe>Iframe in Detail
That was easy and fun, wasn't it? iframe elements are designed to let you embed other web documents into the current document. This is great for embedding third-party content into your website—such as videos from online video providers, comment systems like Disqus, online maps from map providers, advertising banners, etc.
There are some serious security concerns to consider when working with iframe, as we'll discuss below, but that doesn't mean you shouldn't use them on your sites—it just requires knowledge and careful thinking. Let's explore the code below closely:
<iframe src="https://www.traffic-engine.com/" width="80%" height="500" frameborder="0" allowfullscreen sandbox>
  <p>
    <a href="https://www.traffic-engine.com/">Link for browsers that do not support iframe</a>
  </p>
</iframe>
The code above attempts to load the traffic-engine.com webpage. The result is not as expected—only the page title is displayed.
This example includes the basic elements needed to use an iframe:
- allowfullscreen
- If set, the iframe can be placed in full-screen mode using the Full Screen API.
- frameborder
- If set to 1, the browser will draw a border between this iframe and other iframes—the default behavior. 0 removes the border. Using this is not really recommended, as the same effect can be better achieved using border: none; in CSS.
- src
- The path pointing to the URL of the document to be embedded.
- width and height
- These attributes specify the width and height you want the iframe to have.
- fallback content
- Just like with other similar elements, you can include alternative content between the opening and closing iframe tags, which will appear if the browser does not support iframe. It's unlikely you'll encounter a browser that doesn't support iframe these days.
- sandbox
- This attribute, which works in modern browsers, enforces stricter security settings, which we'll discuss further below.
Security Issues
Browser vendors and web developers have learned from past mistakes that iframes are a common target (official term: attack vector) for malicious actors on the Web (often called hackers, or more precisely, crackers), who use them to attack by modifying the web page or tricking users into doing something they didn't intend to do—such as revealing sensitive information like usernames and passwords.
Because of this, browser developers have implemented various security mechanisms and a set of best practices to consider—we'll cover some of these below.
☞ Clickjacking is a common type of attack where hackers embed an invisible iframe into your document (or embed your document into their own malicious site) and use it to capture user interactions. This is a common way to mislead users or steal sensitive data.
As we saw above, the exemplu-iframe page did not load properly. If we open the developer tools using the F12 key and select "Console", we'll understand why the page failed to load.
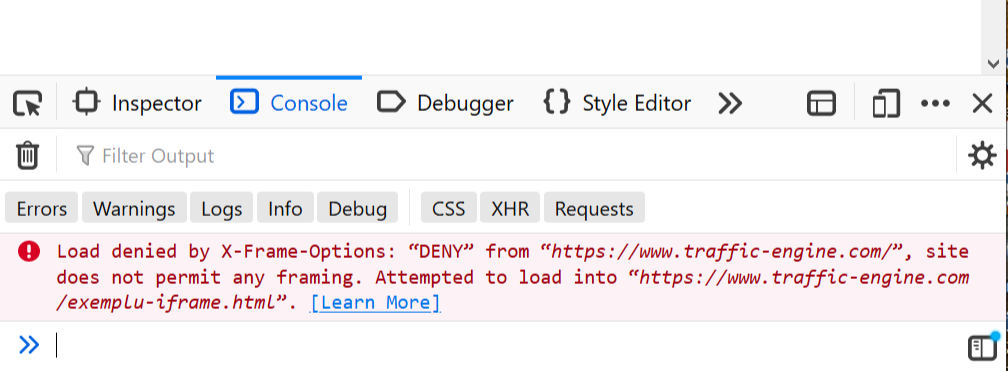
In Firefox, you'll be told that loading was blocked by X-Frame-Options, because the site traffic-engine.com does not allow itself to be embedded in an iframe.
This is due to a server setting that serves the site's pages and prevents them from being embedded in an iframe.
This is normal—it doesn't make sense for an entire page belonging to a site to be embedded in an iframe unless you're trying to claim the page as your own or attempting to steal data through clickjacking, both of which are wrong and illegal.
Additionally, if everyone started doing this, all the extra bandwidth would begin to cost the site owner significantly.
Use iframe Only When Necessary
Sometimes it makes sense to embed third-party content—such as YouTube videos and maps—but you can save yourself a lot of headaches by embedding third-party content only when absolutely necessary.
A good rule for web security is:
“You can never be too cautious. If you built it, double-check it. If
someone else built it, assume it's dangerous until proven otherwise.”
Beyond security, you should also be aware of intellectual property issues. In general, content is protected by copyright both offline and online—even content you wouldn't expect. Never display content on your own web page unless it belongs to you or the owners have given you clear, written permission. Penalties for copyright infringement are severe. Again, you can never be too cautious.
If the content is licensed, you must comply with the license terms. For example, content on our site is licensed under CC-BY-SA. That means you must properly credit us when using our content—even if you make substantial modifications.
Use HTTPS
HTTPS is the encrypted version of HTTP and requires a security certificate. You should serve your websites using HTTPS whenever possible.
HTTPS prevents access to embedded content from the parent document and vice versa.
All reputable companies that make content available for embedding via an iframe will provide it through HTTPS—check the URLs inside the iframe src when embedding content from Google Maps or YouTube, for example.
Always Use the Sandbox Attribute
If you want to give attackers as little power as possible, you should grant embedded content only the permissions it needs to do its job. Of course, this applies to your own content as well. A container for code that can be used safely—or for testing—but cannot cause harm is called a sandbox.
Embedded content without using sandbox can do far too much—execute JavaScript, submit forms, open pop-ups, etc. By default, you should enforce all available restrictions by using the sandbox attribute without parameters, as shown in the previous example.
Let's see what happens if we remove the Header set X-Frame-Options DENY setting from the traffic-engine.com site and use the sandbox attribute with all parameters: sandbox="allow-scripts allow-same-origin allow-top-navigation allow-forms":

The site will load in our page, be fully functional, and all scripts will execute within our page.
For security reasons, we've only displayed an image of the embedded site.
Now let's see what happens if we embed this course page into itself under the same conditions (using sandbox with all parameters):
The page is fully functional!
Now let's do the same thing, but this time use the sandbox attribute without parameters:
As you can see, only the text is displayed and no scripts are executed.
If absolutely necessary, you can add permissions back one by one inside the sandbox.
Warning! If you add both allow-scripts and allow-same-origin at the same time, the embedded content may bypass the same-origin security policy, which prevents sites from executing scripts and using JavaScript to turn the sandbox into something ineffective.
The embed and object Elements
The <embed> and <object> elements serve different purposes than iframe—these elements are general-purpose embedding tools for incorporating various types of external content, including plugin-based technologies like Java Applets and Flash, PDFs (which can be displayed in a browser with a PDF plugin), and even content such as videos, SVGs, and images.
☞ In this context, a plugin refers to software that provides access to content the browser cannot natively read.
However, it's unlikely you'll use these elements very often. They haven't been widely used for years—Flash is no longer popular for several reasons, PDFs are now opened directly by browsers, and images and videos have much better and easier-to-manage elements. We've mentioned these elements in case you encounter them in certain circumstances.
SVG Images – Scalable Vector Graphics
Images created using vector graphics are very useful in many situations—they have small file sizes and are highly scalable, meaning they don't pixelate when enlarged to a large size.
On the web, you'll work with two types of images—raster images and vector images:
- Raster images are defined using a grid of pixels—a raster image file contains information that specifies exactly where each pixel should be placed and what color it should be. Popular raster formats include Bitmap (.bmp), PNG (.png), JPEG (.jpg), and GIF (.gif).
- Vector images are defined using algorithms—a vector image file contains shape and path definitions that the computer can use to calculate how the image should appear when rendered on screen.
To get a clear idea of the difference between the two, let's look at an example showing two seemingly identical images side by side. The difference is that the one on the left is a PNG image, and the one on the right is an SVG image.
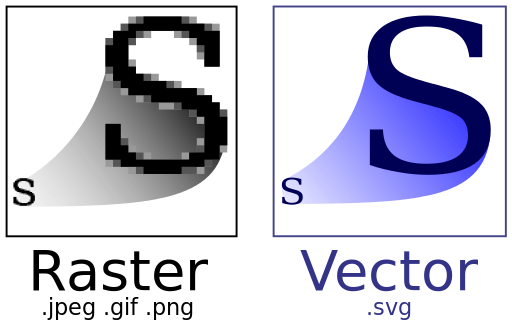
As you can see, the PNG image becomes pixelated as it's enlarged, because it contains information about where each pixel should be (and what color). When the image is scaled up, each pixel is simply enlarged to fill more screen space, causing the image to appear blurry. However, the vector image continues to look crisp and clean, because regardless of its size, algorithms are used to render the image, and values are simply scaled as they grow.
Moreover, vector images are much smaller than their raster equivalents, because they only need to include a handful of algorithms rather than information about every individual pixel in the image.
What Is SVG?
SVG is an XML-based language for describing vector graphics. Essentially, it's markup—just like we use to mark up elements in HTML—except it includes different elements for defining the shapes we want to appear in the image and the effects we want to apply to those shapes. SVG is for graphic markup, not content markup. At the simplest end of the spectrum, you'll find elements for creating basic shapes like <circle> and <rect>. More advanced SVG functions include <feColorMatrix> (transforms colors using a transformation matrix), <animate> (animates parts of the image), and <mask> (creates a mask over the image).
The following code is very simple and creates a circle:
<svg height="100" width="100">
  <circle cx="50" cy="50" r="40" fill="red" />
</svg>
From the example above, you might think SVG is easy to code manually. Yes, you can manually code a simple SVG in a text editor, but for a complex image, this quickly becomes very difficult. To create SVG images, vector graphic software like Illustrator is typically used.
SVG has several advantages beyond those already mentioned:
- Text within vector images remains accessible (which is great for SEO).
- Each component of the image can be styled with CSS or manipulated with JavaScript.
SVG also has some disadvantages:
- SVG can become very complex, which means file sizes can grow. Complex SVGs may require significantly more processing time in the browser.
- SVG can be harder to create than raster images, depending on the type of image you're trying to build.
- SVG is not supported in older browsers.
How to Add SVG Images to a Web Page
In this section, we'll go through the different ways you can add SVG vector graphics to your web pages.
Embedding SVG Using the img ElementTo embed an SVG using an img element, you simply need to insert the path to the image in the src attribute. You'll need a height or width attribute (or both, if your SVG doesn't have a default aspect ratio).
<img src="star.svg" alt="star" height="100" width="100">Advantages:
- Quick and familiar syntax.
- The image can be turned into a hyperlink.
Disadvantages:
- You cannot manipulate the image with JavaScript.
- If you want to control the SVG content with CSS, you need to include inline CSS styles inside the SVG code.
- You cannot restyle the image using CSS pseudoclasses (like :focus).
You can also open the SVG file in a text editor, copy the SVG code, and paste it into your HTML document—this is sometimes called inline SVG. Make sure the SVG code snippet begins and ends with the <svg>...</svg> tags (don't include anything outside those tags). Below is an example of a slightly more complex SVG image:
<svg xmlns="http://www.w3.org/2000/svg">
  <g>
    <circle id="dot" cx="60" cy="60" r="60"/>
    <text x="12" y="73" font-family="Verdana" font-size="35" fill="white">HTML</text>
  </g>
</svg>
Here's the result:
Advantages:
- If you embed SVG inline, you save an HTTP request, which reduces loading time.
- You can assign classes and IDs to SVG elements and style them with CSS. In fact, you can use any SVG presentation attribute as a CSS property.
- Inline SVG is the only approach that allows you to use CSS interactions (such as :focus) and CSS animations directly on the SVG image.
- You can turn the SVG into a hyperlink by wrapping it in an <a> element.
Disadvantages:
- This method is suitable only if you use the SVG in a single place. Duplicating it can increase the HTML file size.
- The browser cannot cache inline SVG the way it does with other image types.